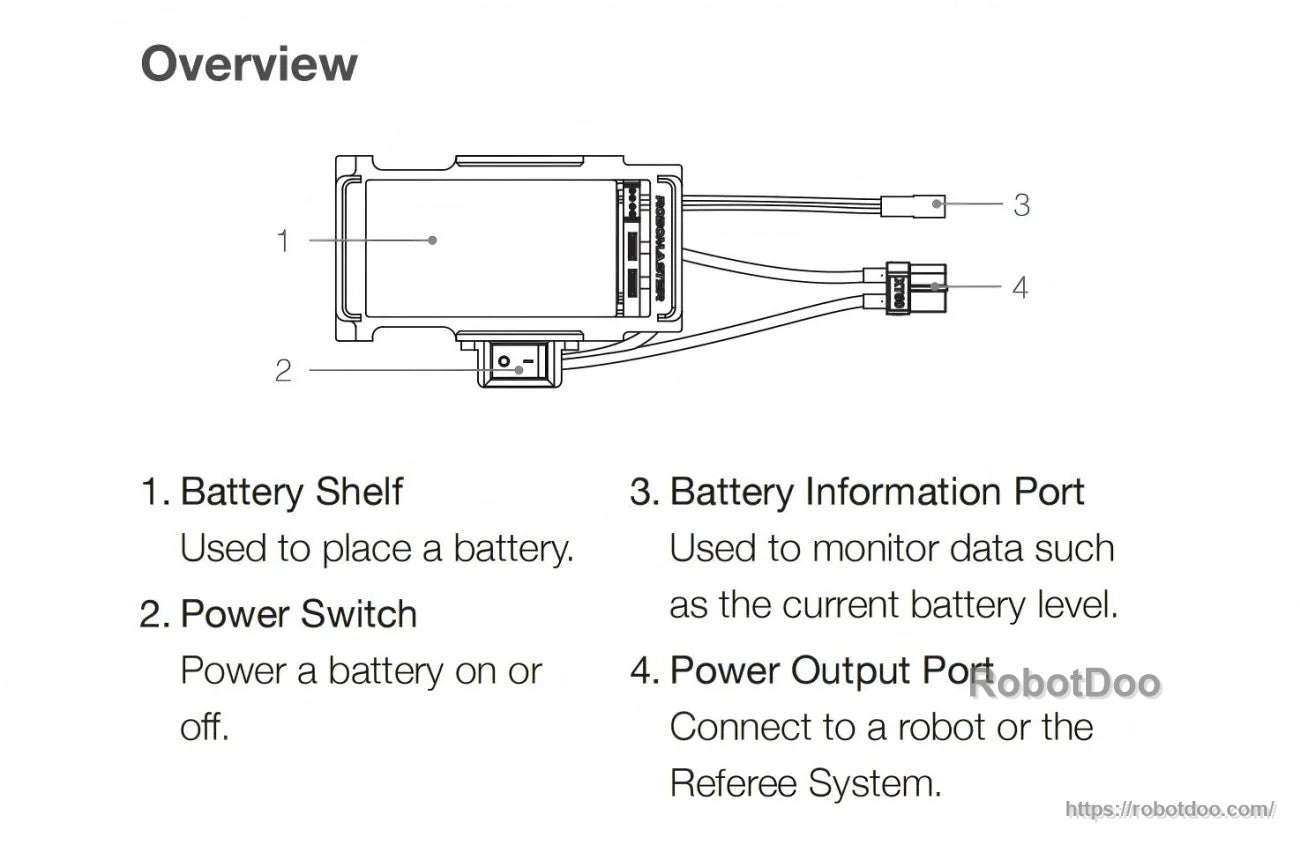
Overview
The DJI RoboMaster Battery Rack is a battery rack used to hold a battery and provide a power output connection to a robot or the Referee System. It includes a battery shelf, power switch, battery information port for monitoring data such as the current battery level, and a power output port.
Key Features
- Battery shelf: Used to place a battery.
- Power switch: Power a battery on or off.
- Battery information port: Used to monitor data such as the current battery level.
- Power output port: Connect to a robot or the Referee System.
- Mounting interface: Threaded M3 screw holes; minimum of three M3 screws required for proper mounting.
- Screw hole depth: 6 mm (do not use screws longer than this depth to avoid damage).
Specifications
| Weight | 85 g |
| Power Output Port Connector | XT60 |
| Max Operating Current (Continuous) | 35 A |
| Dimensions (Top View) | 103.50 mm x 55.40 mm |
| Dimensions (Front View) | 75 mm (width), 37.50 mm (height), 22 mm (inner height) |
| Dimensions (Side View) | 45 mm (length), 22 mm (height) |
| Mounting Holes | 4 x M3 (threaded) |
| Threaded Hole Depth | 6 mm |
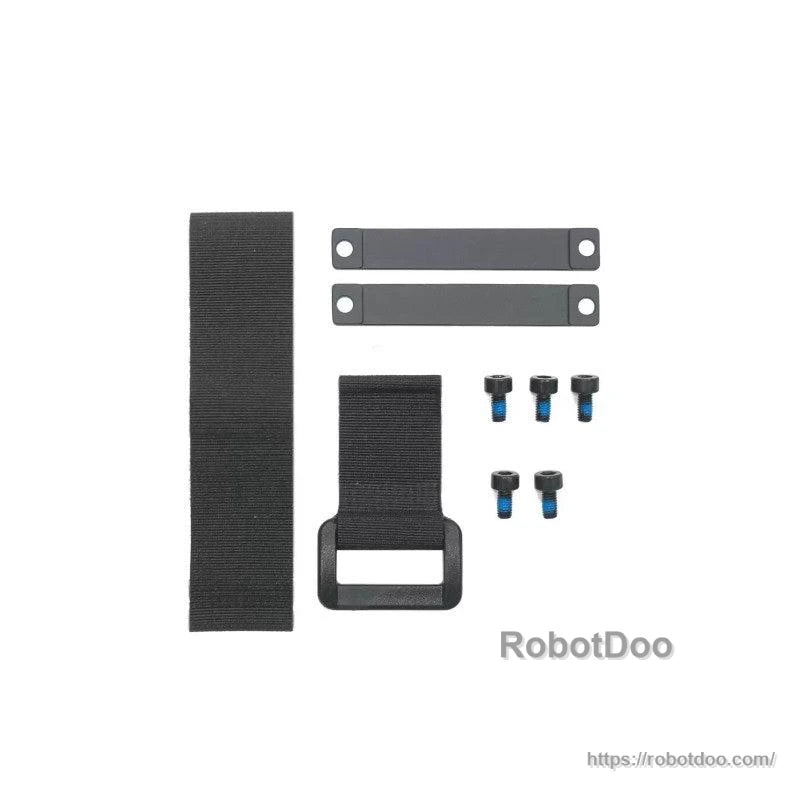
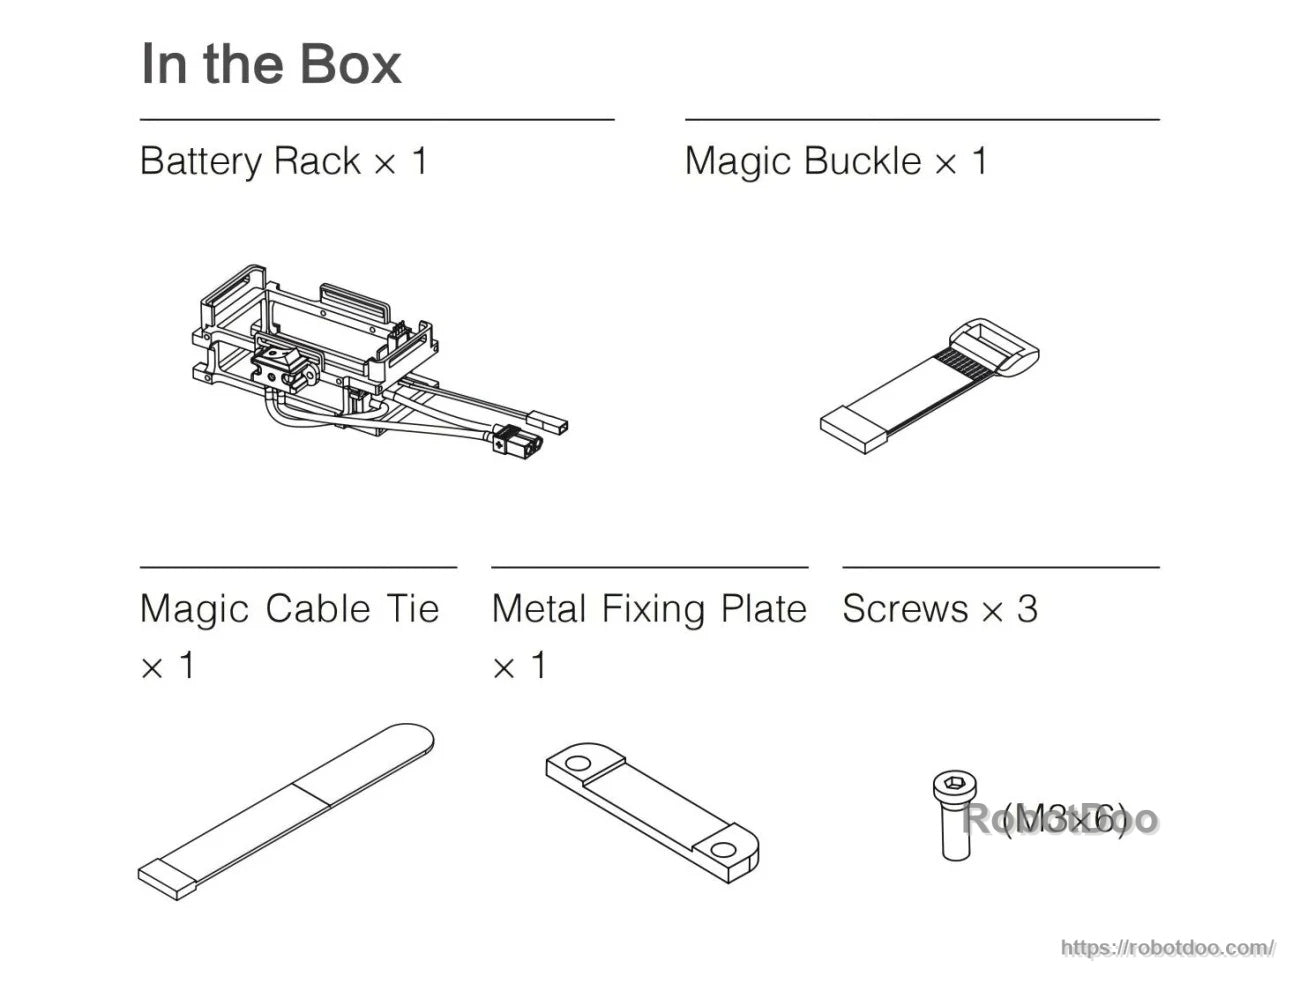
What’s Included
- Battery Rack x 1
- Magic Buckle x 1
- Magic Cable Tie x 1
- Metal Fixing Plate x 1
- Screws x 3 (M3 x 6.0)
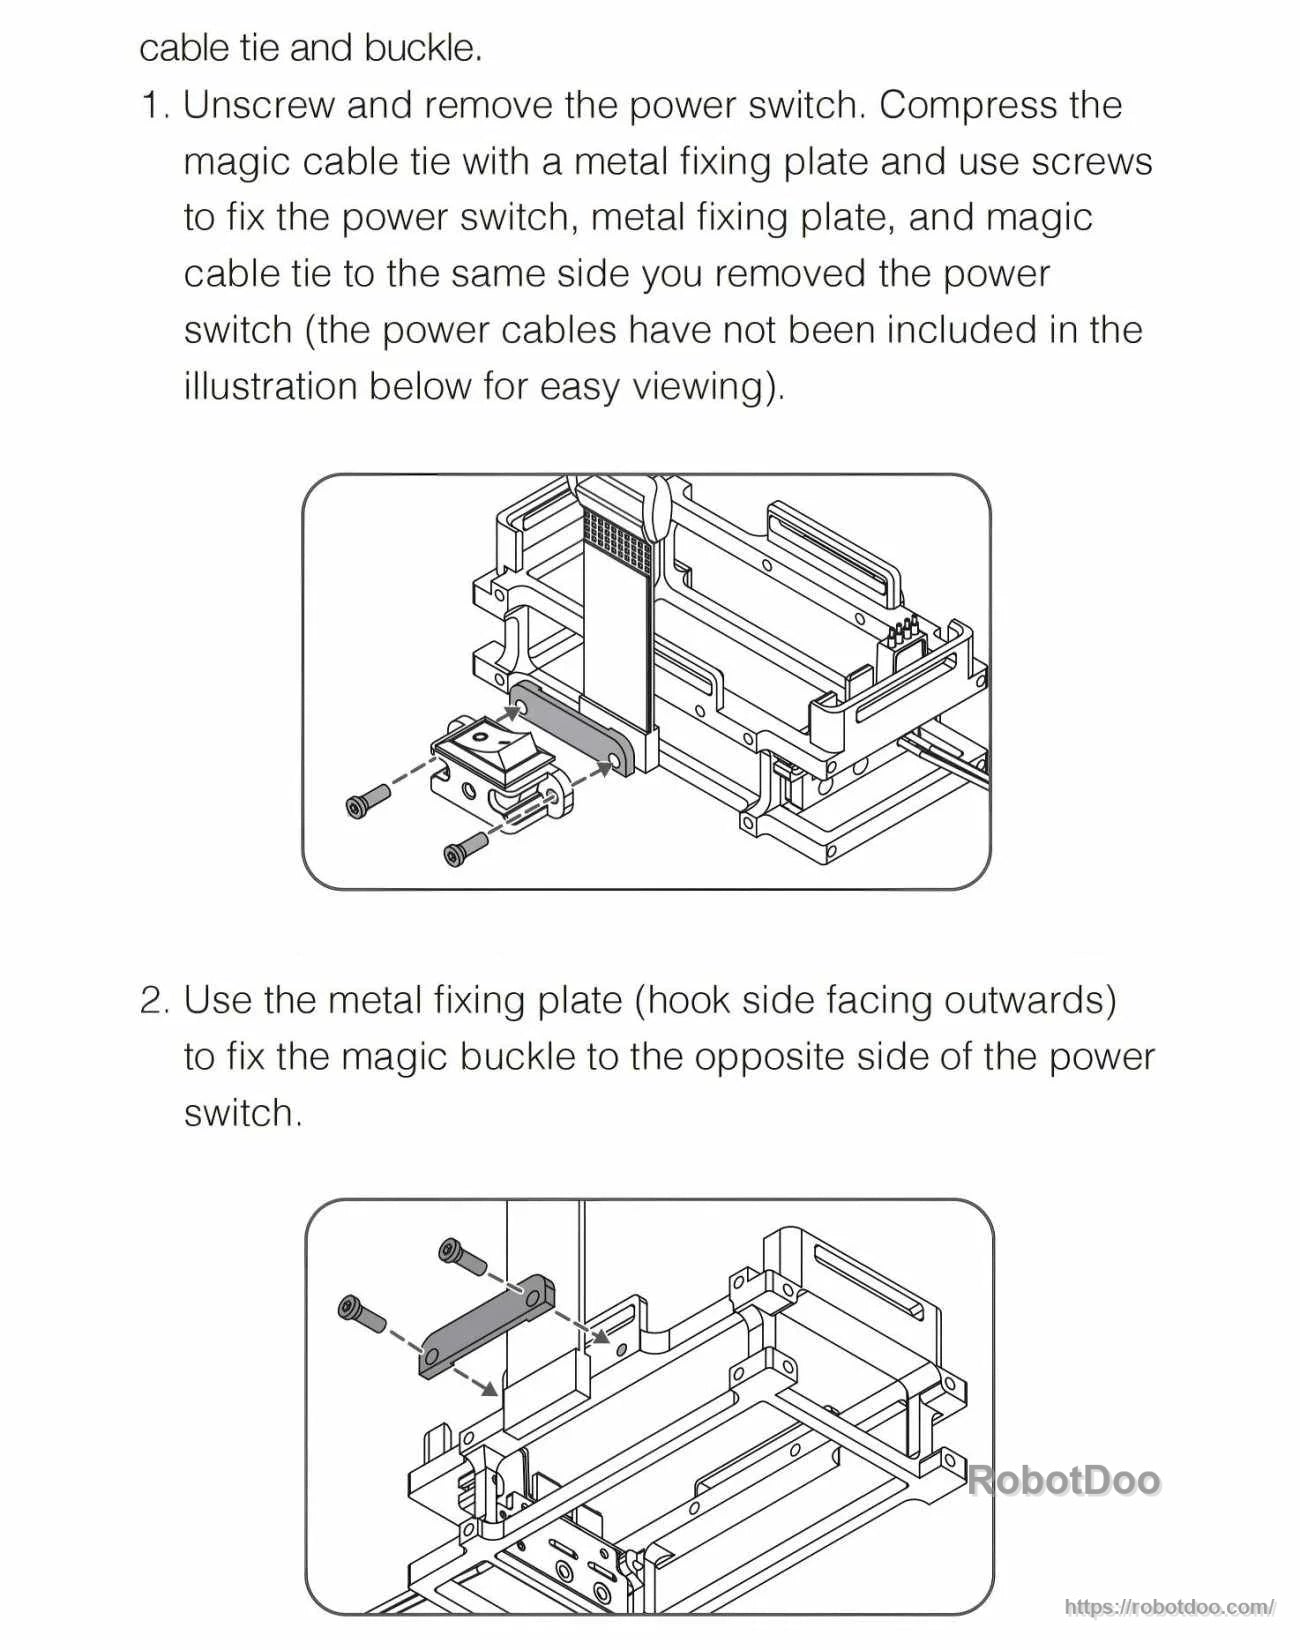
Mounting & Usage Notes
- When mounting the Battery Rack, use at least three M3 screws.
- Do not use screws longer than 6 mm (threaded hole depth).
- After mounting the Battery Rack, insert a battery into the Battery Rack in the same direction as illustration ①, then secure the magic cable tie as in illustration ②.
- Power-on steps: (1) Connect the power output port to a robot or the Referee System. (2) Press the battery power button once to check the battery level, then press and hold to turn on the battery.
For installation and compatibility questions, contact the store customer service team.
Manuals
- RoboMaster-Battery_Rack-User_Guide.pdf
Details
Everything needed to secure and mount the RoboMaster battery rack is included in the box, including the buckle, cable tie, fixing plate, and M3 screws.
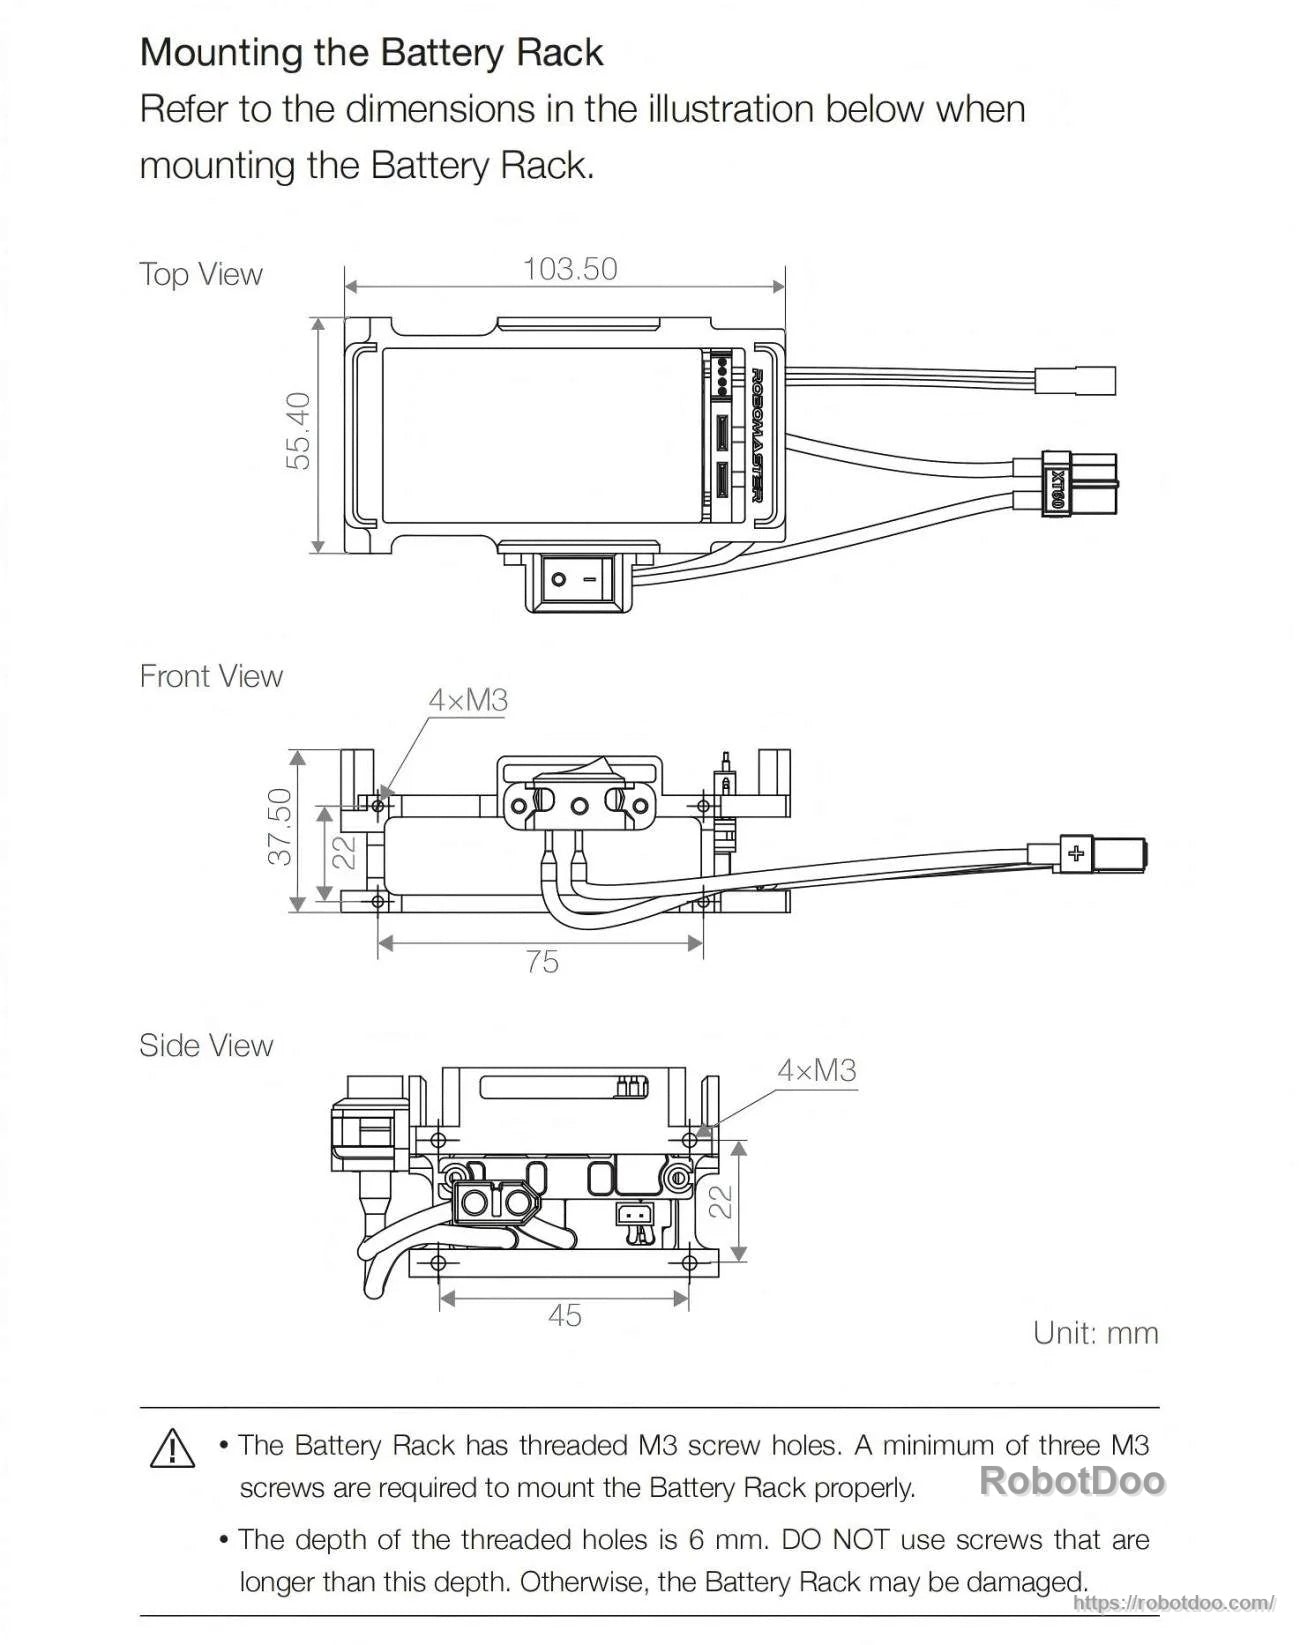
Use the dimensioned drawing to plan mounting clearance and fastener length; the threaded M3 holes are 6 mm deep.
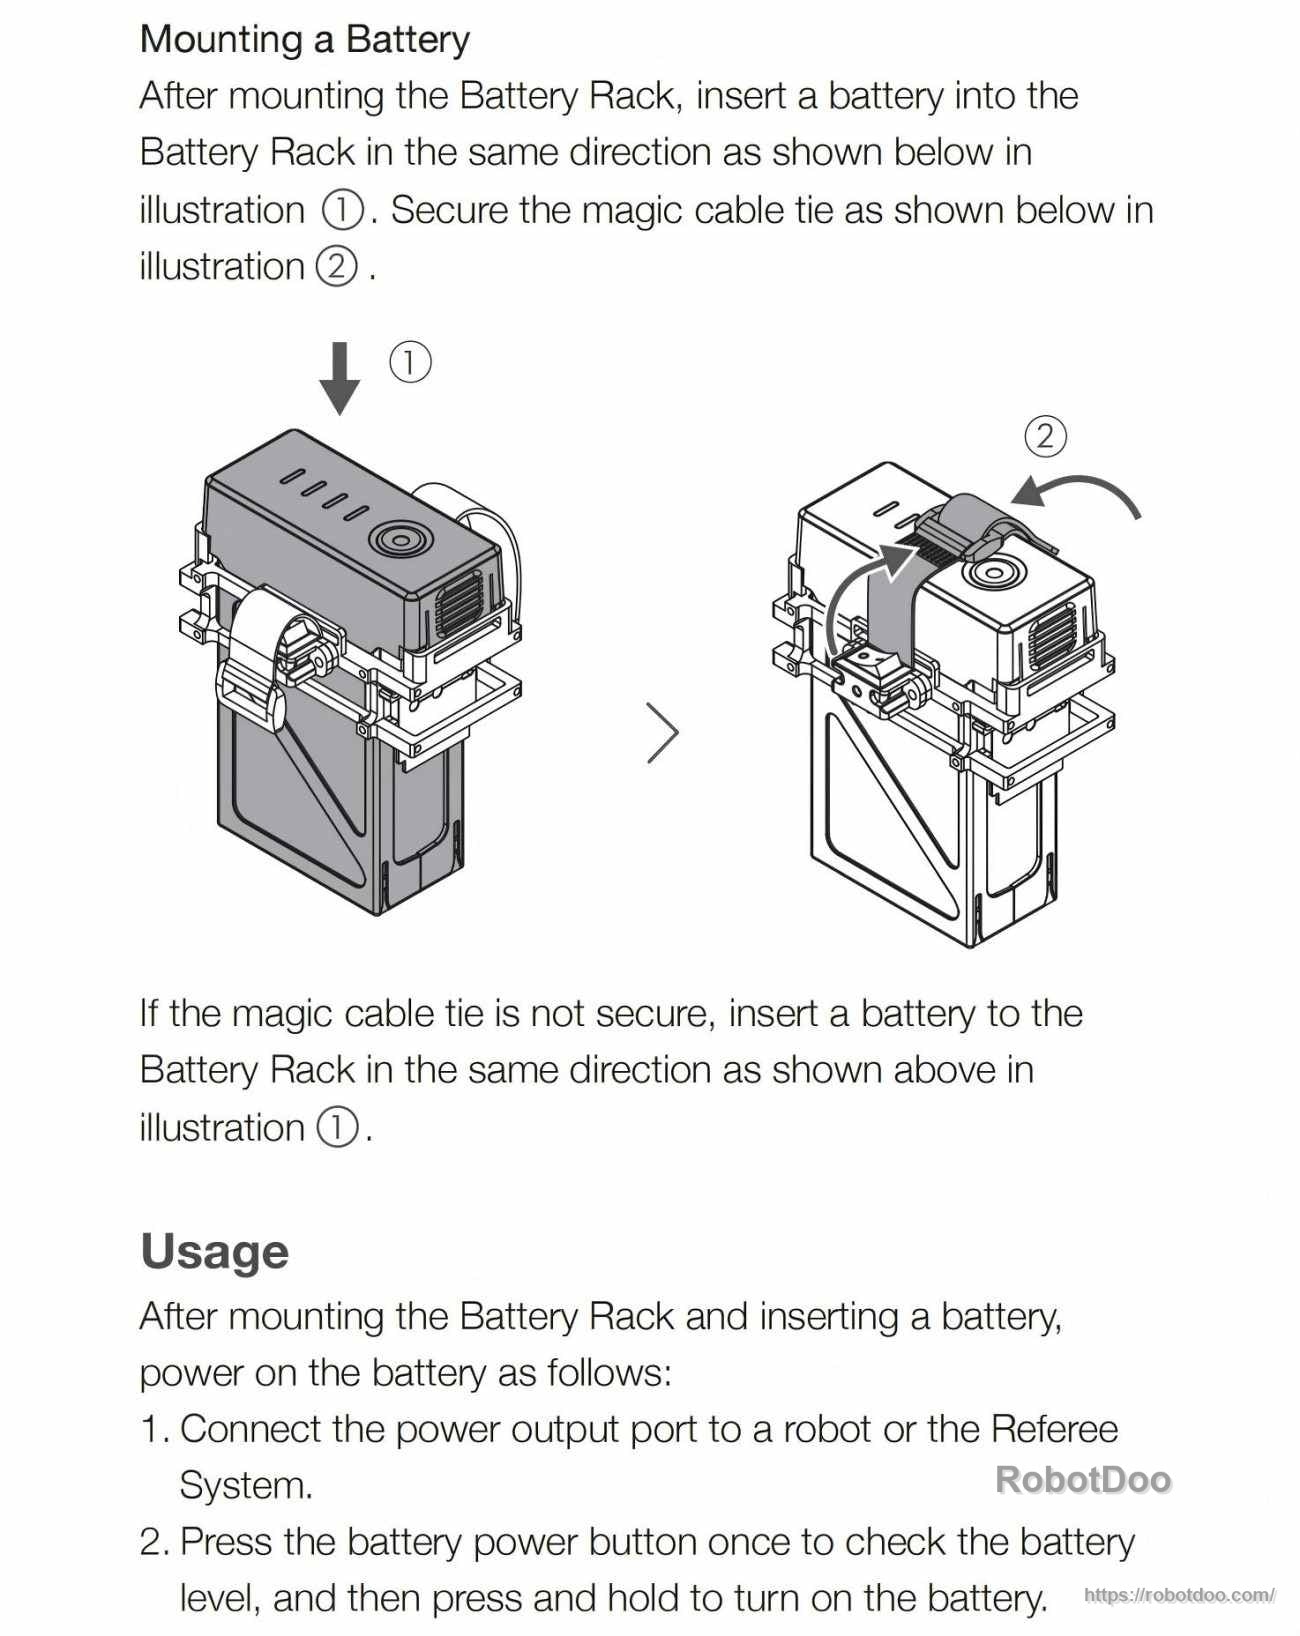
Insert the battery in the correct orientation, tighten the cable tie, then connect the output to the robot or Referee System before powering on.